Configuring XenDesktop 5.6 with Provisioning Services 6.1 and System Center Virtual Machine Manager 2012 RC
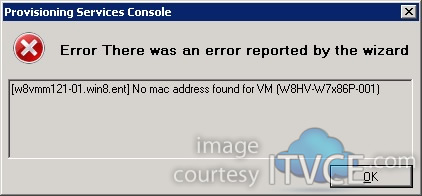
There have been a lot of amazing announcements this week, the most notable was the availability of XenDesktop 5.6 and Provisioning Services 6.1 which now both support System Center Virtual Machine Manager 2012 Release Candidate (and RTM once announced). In addition, Microsoft announced the availability of System Center Virtual Machine Manager 2012 SP1 Community Technology Preview (CTP) which extends the SCVMM capabilities to support “Hyper-V 3” on codenamed Windows Server “8”. With a little playing around, I was able to determine that both XenDesktop 5.6 and PVS 6.1 may require additional code changes to support SP1. For example, for PVS the XenDesktop Setup Wizard runs all the way through (for both Server 2008 R2 SP1 and Server “8” hosts) and errors at the final stage when assigning the MAC address from the SCVMM MAC Address Pool:
Since SCVMM 2012 SP1 was just released for CTP and is assumably months from release, let’s dive into SCVMM 2012 RC and its integration with XenDesktop 5.6 and Provisioning Services 6.1. XenDesktop 5.6 now supports the Personal vDisk capability aquired from RingCube in the Fall of 2011. During the XenDesktop 5.6 Virtual Desktop Agent installation, a new screen has been added which slips in the personal vDisk component if desired:
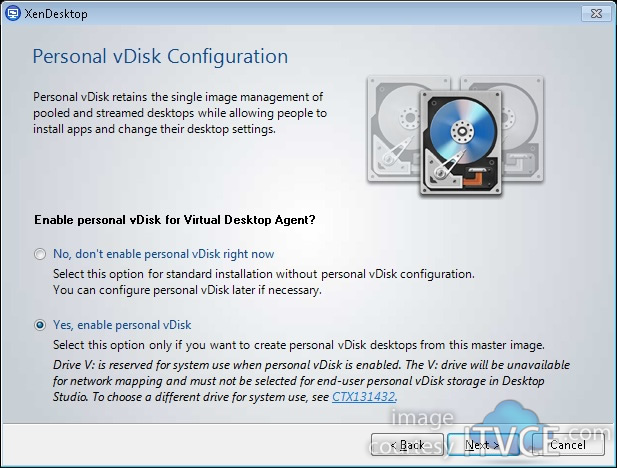
With the exception of this one screenshot, all other installation procedures are the same from XenDesktop 5.5 to 5.6 and PVS 6.0 to 6.1. SCVMM 2012 introduces high availability of the VMM service using clustering covered here. This is strongly recommended for production deployments once SCVMM 2012 is released. For this demonstration, I used a single VMM server with a simple CNAME DNS record for the XenDesktop connection. To reproduce my configuration, the minimum requirements are the following:
1 XenDesktop 5.6 Controller and Site/Database configured
1 standalone SCVMM 2012 server
1 Hyper-V host (Server 2008 R2 SP1)
Hyper-V host added to SCVMM fabric (Agent deployed)
– At least one Placement location defined in the Host Properties
– If using Machine Creation Services, a windows share created for each placement location
– At least one VM Template with a Legacy network adapter and optionally an NTFS formatted cache disk created in SCVMM if using PVS
SCVMM 2012 RC Console installed on all XenDesktop Controllers in the Site
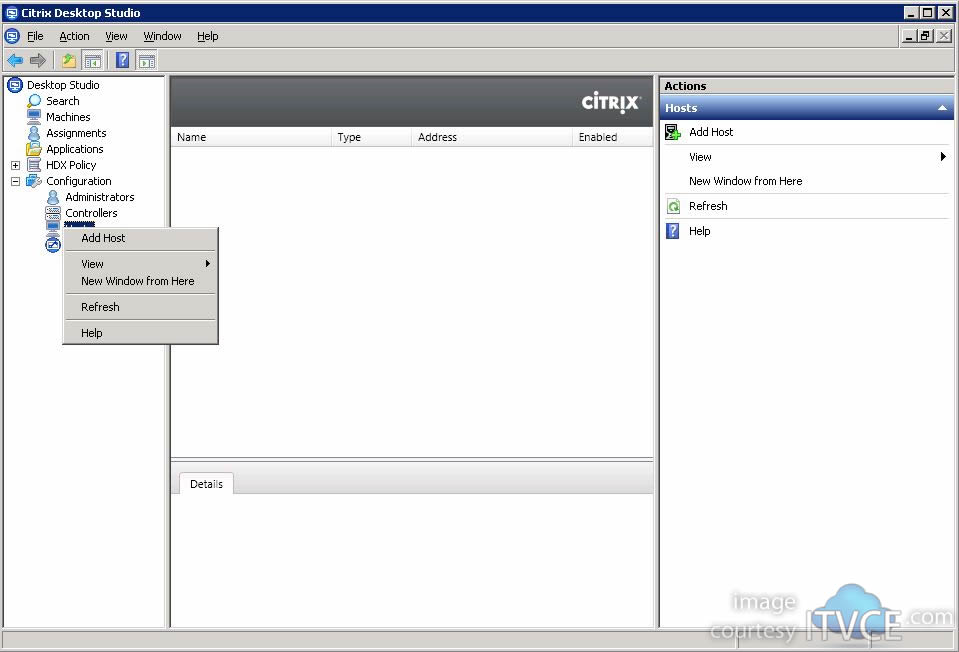
During the XenDesktop site creation, bypass the hypervisor configuration as I typically do that in a seperate step. Navigate to Configuration -> Hosts. Right click the Hosts folder and select Add Host:
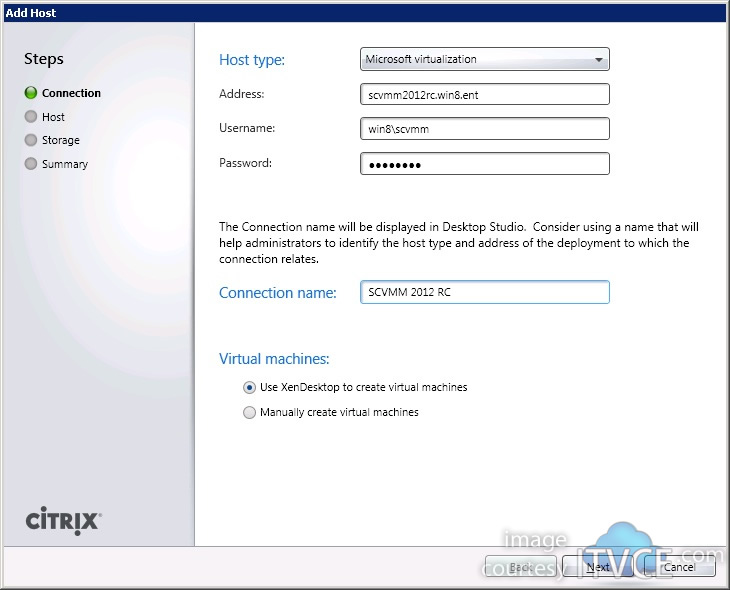
Select Microsoft Virtualization. Enter the FQDN to your SCVMM host (in my case I used a CNAME record). Enter the username and password. Enter a connection name. (Optional) Select Use XenDesktop to create virtual machines if you are going to be using Machine Creation Services. Click next:
Click Browse
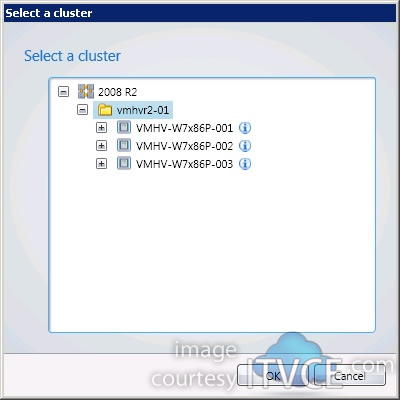
Expand the Host Folder and select the applicable host or cluster:
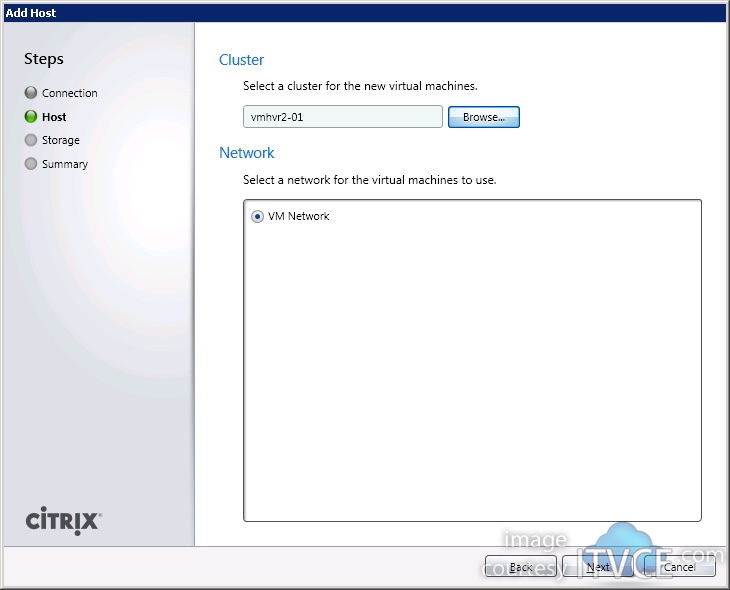
If multiple networks are available, select the appropriate network and click Next:
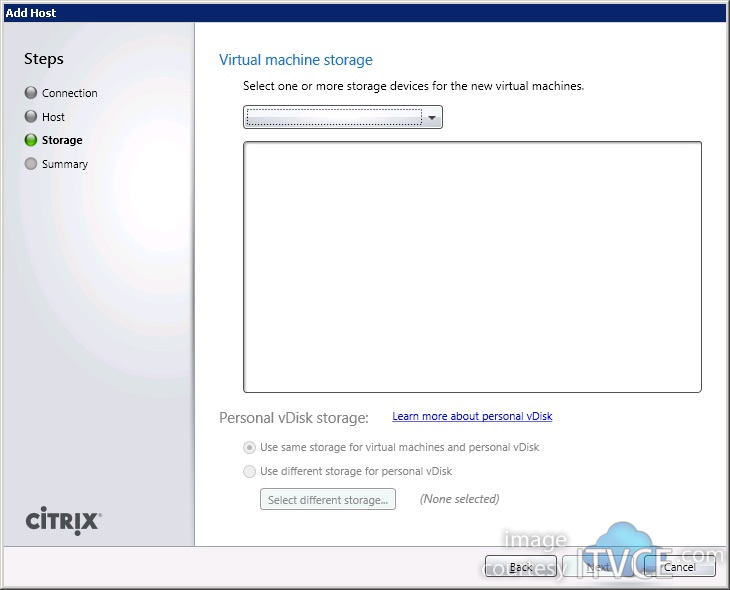
The next screen should show available storage locations. If you see the following screen, double check to ensure you have defined a placement location for the host in SCVMM and that you have a Windows Share created on the Hyper-V host as discussed in the requirements above:
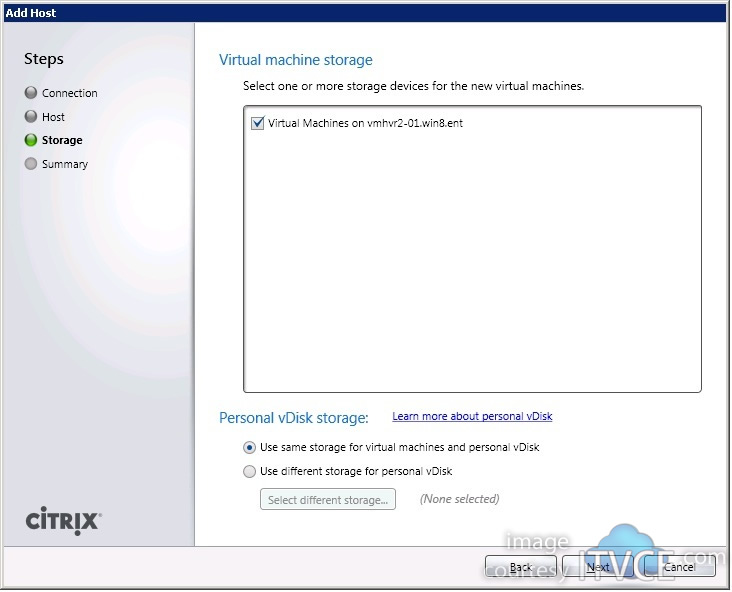
When the Placement location is properly defined and the share exists on the Hyper-V host, you should see the following. Note the new options available for RingCube Personal vDisks described earlier:
Name the host or cluster for easier distinction in Desktop Studio.
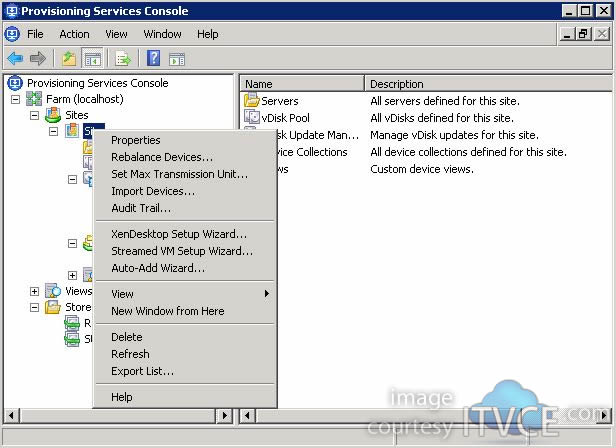
Now it’s time to switch gears to discuss PVS 6.1 and the XenDesktop and Streamed VM Setup Wizard. Assuming you have a PVS site created and a vDisk captured and in standard mode, start by right clicking on the appropriate site and you will see two options, just as before. For this demonstration, I’m going to use the Stream VM Setup Wizard, since we already showed how XenDesktop 5.6 integrates with SCVMM 2012 RC:
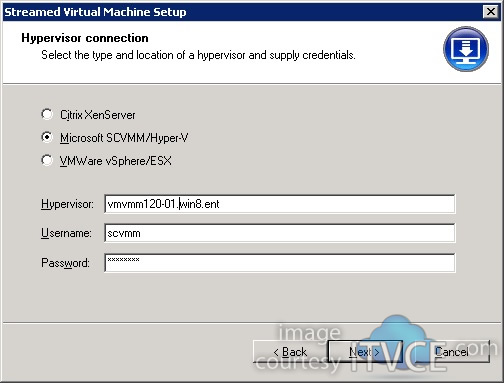
Connecting using the CNAME record generates the following error;
To avoid the error, I found it best to use the SCVMM hostname directly:
Select the appropriate host or cluster:
Select the storage location for VM Placement:
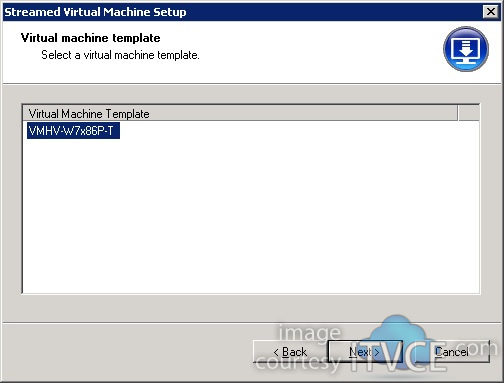
Select the VM Template for PVS:
If no templates are listed, make sure you have them created in SCVMM under Library -> Templates -> VM Templates. Also, ensure this template has a legacy network adapter with a Dynamic MAC address and optionally a pre-formatted NTFS disk for cache on local hard disk if desired:
Select the destination collection (these target devices can be moved post creation) and a vDisk in Standard Mode that can be assigned:
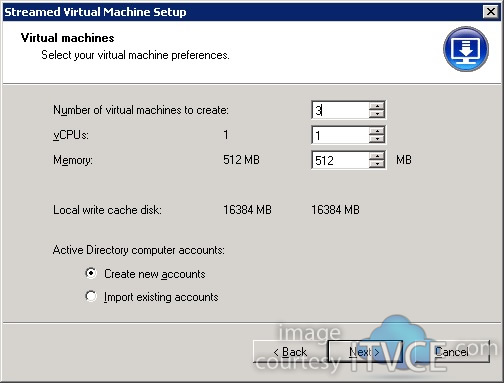
Change the number of VMs to create and any additional desired options:
Enter the naming convention and the appropriate Active Directory Organizational Unit for the Computer Accounts:
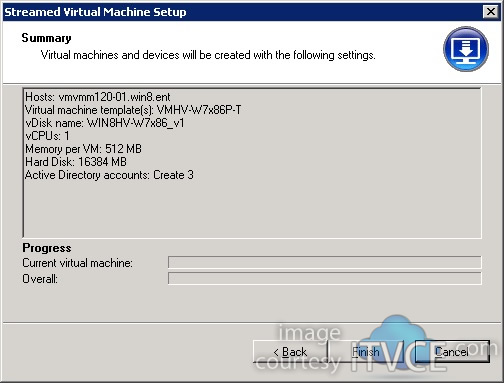
Click Finish to begin creating the virtual desktops:
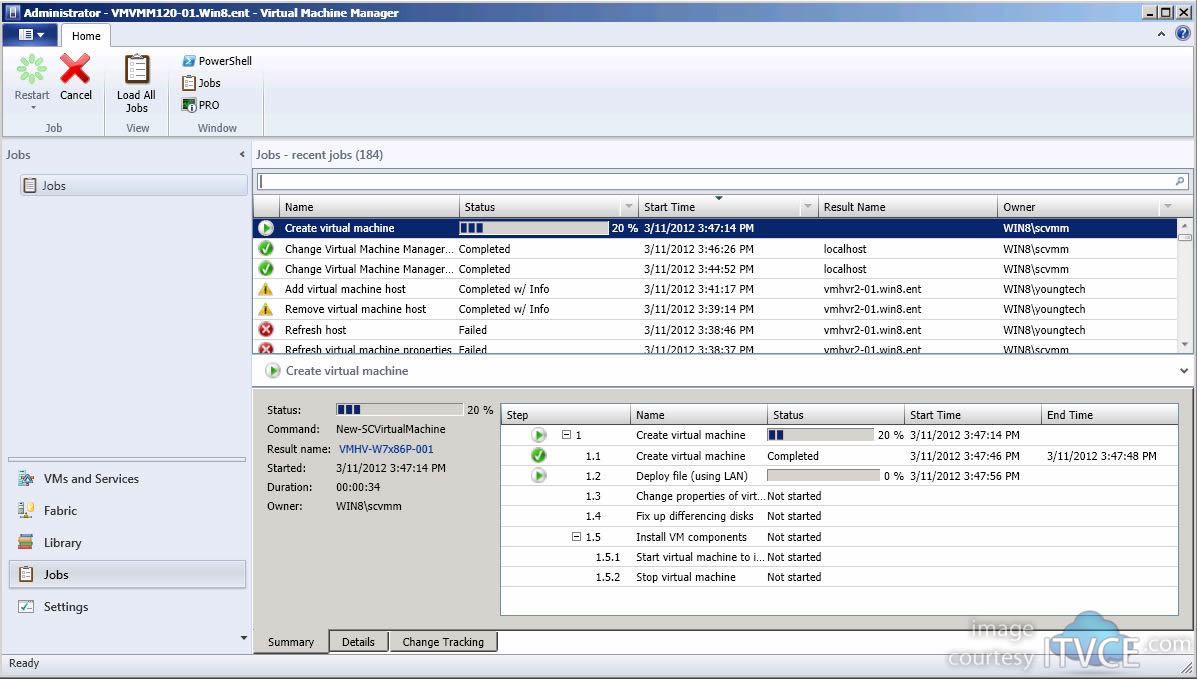
At this point you should begin to see the Virtual Desktops being created through SCVMM in the jobs section:
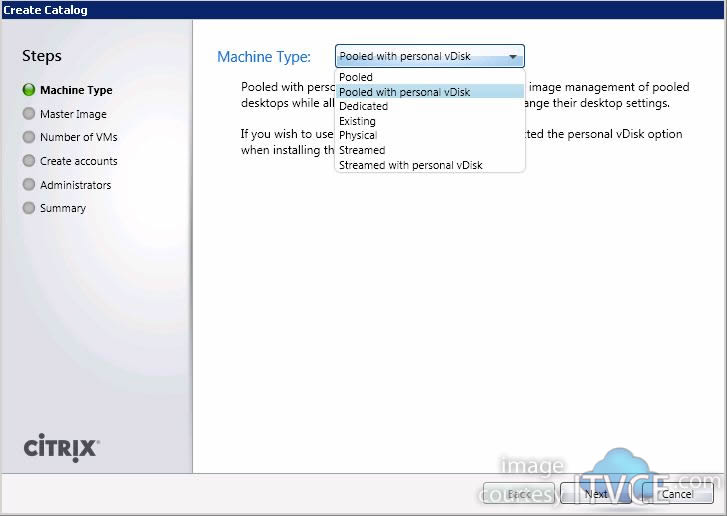
The XenDesktop Setup Wizard will render similar results, but will additionally create the XenDesktop Catalog and use the host connection defined in Desktop Studio. Switching gears again, let’s take a look back at Desktop Studio and create a MCS Catalog. You may note when creating a catalog there are two new options available, “Pooled with personal vDisk” and “Streamed with personal vDisk”. For this demonstration, I will be selecting Pooled with personal vDisk:
Select the applicable host and click the browse button to select a master image:
Enter the number of virtual machines and necessary options and choose a drive letter for the personal vDisk:
Enter the naming convention and the appropriate Active Directory Organizational Unit for the Computer Accounts:
Enter a description if desired:
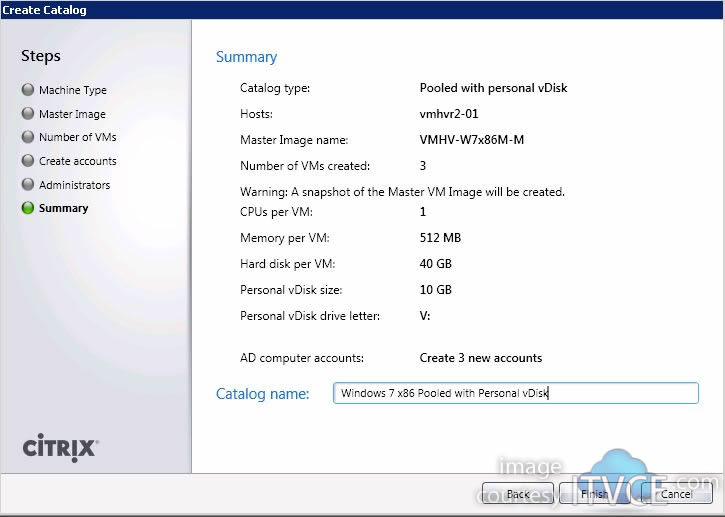
Enter the catalog name:
SCVMM will create the checkpoint and start cloning off the machines for MCS:
That just about covers each of the integration components between XenDesktop 5.6, Provisioning Services 6.1 and System Center Virtual Machine Manager 2012 RC. If you have any questions, comments, or just want to leave feedback, please do so below. Thanks for reading!
–youngtech














Hello,
I just installed in my test lab windows 2012 hyper v, xendestop on windows 2008 r2, scvmm 2008 r2 but am facing issues host hyper v machine is giving yellow mark in scvmm console, and unable to connect any vms.
Please can you advice what is the best way can we use and is this below configuration is fine.
windows 2012 hyper v as host and gust windows 2008 r2
Hello,
WS2012 Hyper-V is only supported with the SCVMM 2012 SP1 released earlier this month. Furthermore, XenDesktop and Citrix Provisioning Services do not currently support SCVMM 2012 SP1 or WS2012. Therefore, you will need to use WS2008R2 Hyper-V w/SCVMM 2012 until the latest versions are supported.
Thanks,
–youngtech
Hi,
Do you know or have the article on the step-by-step to create streamed with personal vDisk machine type from PVS using XenDesktop Setup Wizard?
And, what is the different with streamed with PVD option in DDC’s catalog?
I’m using the W2K8R2 SP1 with Hyper-V role enabled, SCVMM2012, PVS 6.1, XD 5.6, latest PVD and having an issue creating streaming desktop with PVD from PVS.
Appreciated if you can enlighten me on this.
Cheers.
Vibranze,
Absolutely. Be watching for future articles on this topic.
Thanks!
–youngtech